Wednesday, February 20, 2013

Lego Star Wars 6th Birthday

We celebrated Nathan's 6th birthday back in August and I am just getting around to posting it.  A little behind, huh?

So, Nathan is all about Legos.  They boy lives and breathes Legos.  They are literally ALL OVER MY HOUSE-I have even found some in the fridge!  His second favorite thing is Star Wars. Obsessed. What was a mama to do, but combine his two favorite things--hence a Star Wars Lego birthday party!

This post is going to be about the food and decorations.  I have a ton of pictures of the action, but can't really post them due to the fact that lots of the kiddos in the pics aren't mind.  Only three are, and I wasn't sure if all the mamas out there would want their kids pictures on the www.  ;)

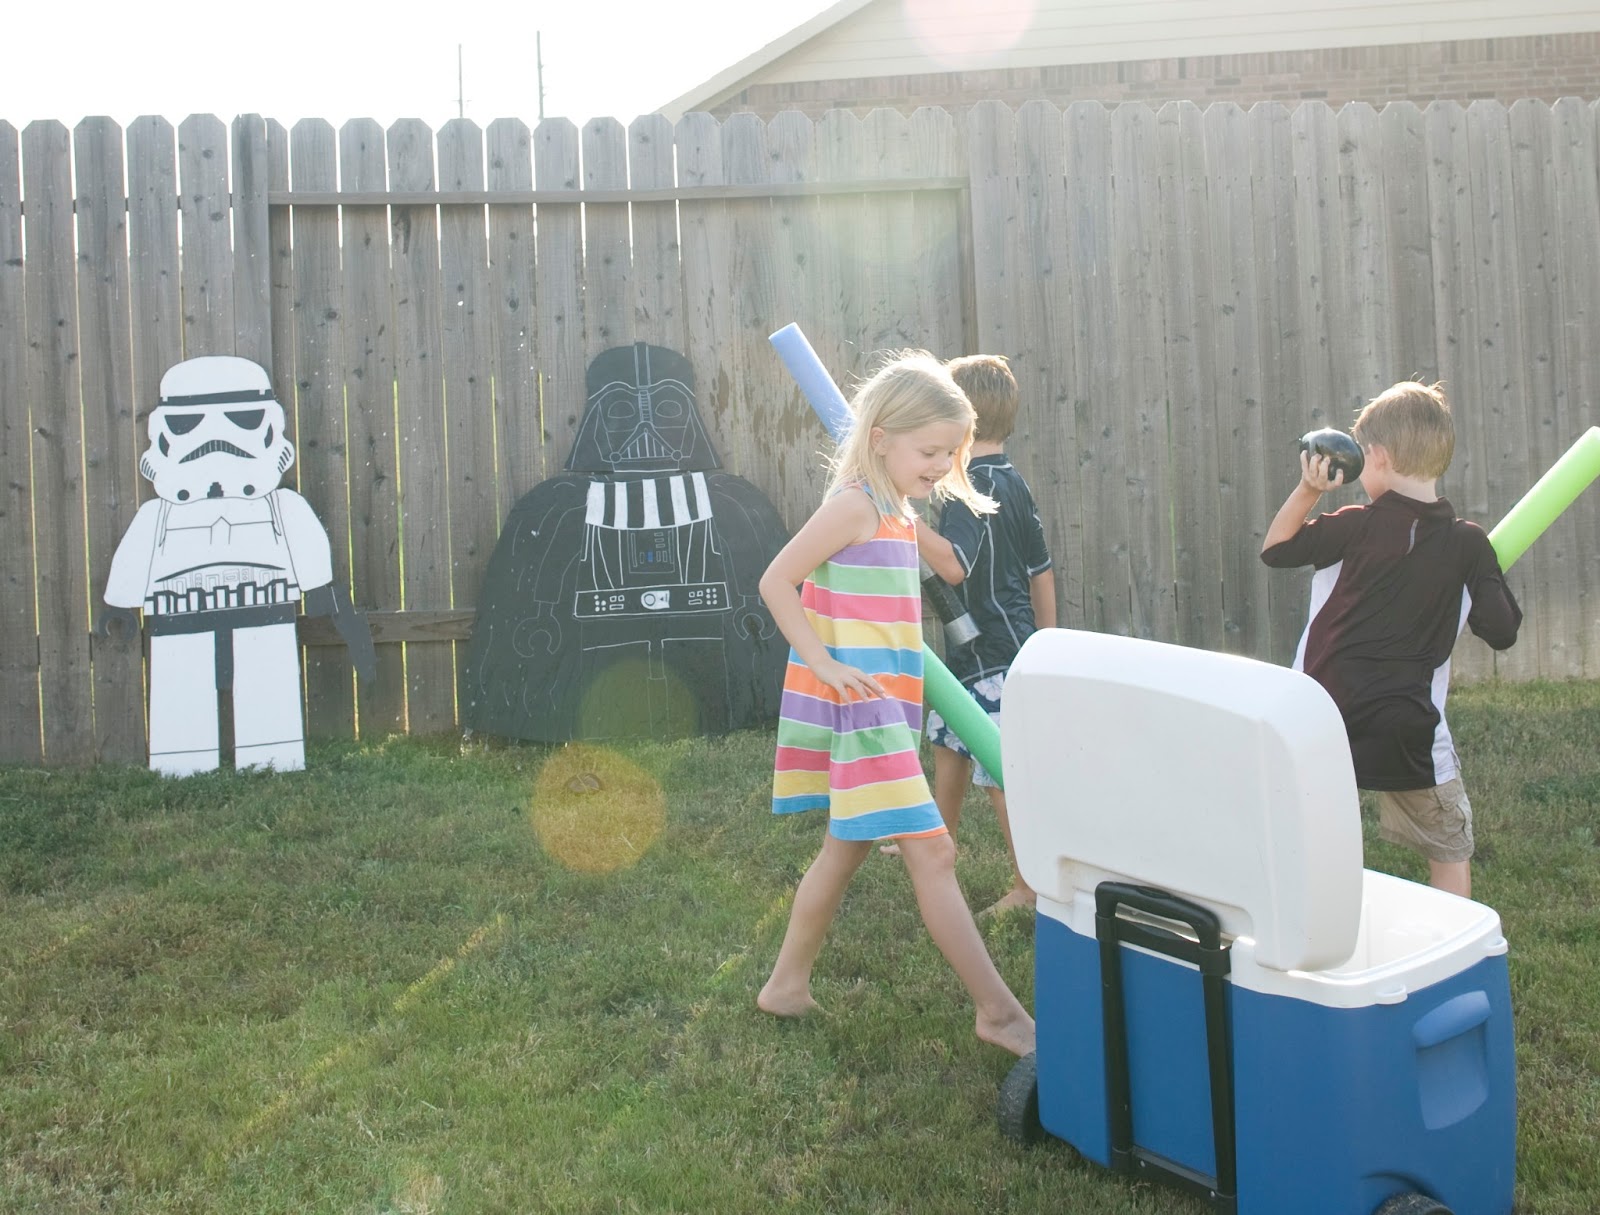
My hubby always cuts out and paints a special figure to greet the guests, kinda sets the mood for the whole party.  Who is better to say "Hello" to everyone than a Storm Trooper! Of course he needed some silver and black balloons!


When everyone came inside, I had our entryway table all set up. I bought the black buckets from the Target Dollar Spot (that place makes my heart go pitter patter).  Then I found a Vader head online and turned it into a SVG file.  I used my Silhouette machine to cut out Vader's head in silver vinyl and then put it on each bucket.  I tied blue and silver ribbon on the handles.  These are the buckets that the kids used for the candy bar.

Also on the table are the bubble light saber wands.  The kids loved these, although I should hav bought more pink ones.  A lot of the girls were pretty disappointed when they didn't get pink.

I also had a jar of Legos.  The guests had to guess how many were in the jar and write it down on the paper that I created in Photoshop.


What party is complete without a ton of sweets??!!  Have to sugar those kids up and then send them home!  I had a candy buffet set up and made these little signs for each bucket.  You can't really tell from the picture, but the candy Lego bricks are in little Vader Easter Eggs.


I also found these cute marshmallow pops at Walgreens of all places! But, if you can't find them there, I also saw them at Toys R Us this weekend, a bit pricier, though.  I had yoda ones, too.


Cupcakes with character rings and cookies were on the dessert table, too.


The cute forks I bought for the cake.  I found them on Etsy and it was love at first sight!


The banner above the dessert table took me forever to make!  The back paper is silver glitter, though you can't really tell from the pic. 


I had a ton of food set up in the kitchen for everyone. We had Jabba the Hut Dogs, Sand People wiches, X chicken Wings, and Han burgers.


I made another banner for our mantel, and then N brought down all of his little Lego Star Wars people.


As far as activities go, we had a Jedi Obstacle course that was so much fun.  The kids wore their bathing suits, went through a waterslide, a pvc car wash thingy that I found on Pinterest, used their pool noodle foam light sabers to keep balloons up on the trampoline, and shot nerf gun darts and lego minifigures.  They also threw water balloons at some more wooden cut outs that my hubby made.  

Then they went on a scavenger hunt. Here is an example of two of the clues. There were six.


At the end of the scavenger hunt was a little packet of legos for the kids to put together.  My dear, sweet hubby went to the Lego store one day during his lunch hour and stared at the Lego wall.  He came up with his very own Star Wars Lego creation, a Storm Trooper Buggy.  I love him and the kids loved having their own little set. I loved the price. I put them in a clear baggie with a picture of what it was supposed to look like.  All the kids were able to build it without any help!


After all the fun, it was ice cream sundae and cake time!  I had a little ice cream sundae bar set up and the kids dove right in!


I love this picture!  My little Emma is so, so excited for her big bubba. Pure love. :)


Happy, happy birthday baby boy (6 months late on here).  I love you to the moon and back, N!


*****  I have gotten many requests for the food/candy cards, signs, Lego guessing sheet, and for the rest of the scavenger hunt.  They took me hours to create, but I loved every second of it.  If you would like a copy of the everything, I have decided to sell it all together for $15.  If you need changes, to it, it will be an extra $5.  I hope you understand! If interested, please email at sarahwillig@hotmail.com *****

Wednesday, January 2, 2013

New Year, New Resolutions, New Decor

Resolutions...Did you make any yesterday?  I swear, this year is going to be the year I accomplish all my resolutions.  I probably said the same thing last year, but I really mean it this year.  Really.

So, to hold myself accountable, I am going to post them on the blog for all to see. If you want to share your's with me, I would love to hear them.  Maybe we can cheer each other on!

My first one will probably be the hardest one.  I want to lose weight.  I used to be a skinny minny, as in my nickname used to be Stick.  I could eat and eat and eat and nothing would happen.  I didn't even ever have to work out.  Then, I was blessed with three kids and along with those three blessings came a bigger belly and a god awful muffin top.  So, something needs to give.  I need to learn how to eat better and find some time to actually exercise. Yikes!

My second resolution is to document life a bit more.  I want to do my own version of Project 365, an Instagram version. I always have my phone with me, so why not use it!  I found these templates that would be perfect to document my Instagram pictures with.  I still need to take my pic for today!

My third resolution is to do more with the kids.  I feel like we are just getting by each day.  I feel stressed, I feel rushed, I feel pulled in four different ways.  We need to get out.  We need to go on a journey.  We need to experience life more.  Go to the zoo on a whim or surprise the kids with more park stops on the way home from school.  SOMETHING.

And, drum roll please....

My last resolution is to make our new build house into a home.  We moved into this new house about three years ago.  It is still cold and bare, its just a house.  Well, this year, that is all going to change.  We are going to tackle one project at a time and warm up our house.  I have a ton of design ideas, just haven't had the time or the money to do them all!

So, that leads me to the mood board I have been working on.  Emma and Ellie's rooms were both painted pink the year we moved in and when we found out Ellie was a girl.  Poor Nathan's room has not been touched! I have been collecting ideas for my little Star Wars loving man, and I think I've come up with a room that he can grow into.  Without further adieu, here is the plan for his room.


1.  Benjamin Moore paint colors Newburyport Blue and Marina Gray.  I want to paint three walls the gray color and then the wall with the window will be blue.

2.  Love this shelf from Target, and the price can't be beat!

3.  I want to do some sort of big stripe curtain.  These are from Land of Nod, but I think I may be able to make them for a lot cheaper.

4.  This is going to be another project I will be working on soon.

5. Nathan plays with Legos 99% of the time.  The boy can build anything, but his creations usually get crushed because they are left on the floor.  I think these two shelves would be perfect for him to put his creations on.  I want to hang them up right above his lego table (which is another work in progress project I hope to share with you soon!)

6.  LOVE this print for Chatty Nora.  I think it is perfect for his room--not too in your face Star Wars, but still cute for the true fan.

7. N has bunkbeds and he usually sleeps on the top bunk.  I want to hang this on the wall his bed is up against so he can keep his favorite books and a flashlight right next to him.

8.  He needs some sort of baskets for his shelf to keep his stuff if.  I love the look of wire baskets.  I found these on Amazon for a pretty good price.

9.  I think this gray striped rug would help ground things in his room.

I am still on the look out for the perfect bedding.  I would love to get the Pottery Barn Star Wars bedding, but since he has bunkbeds and I would need to buy two sets, it just isn't in the budget.  I really want just to plain gray, soft quilts.  Then I can always add some of the Pottery Barn shams to the beds.

So, there you have it--N's future room.  What do you think???

I had so much fun making this design board!  If you are interested in one, leave a comment here and we can talk!

Friday, December 14, 2012

Our Annual Elf Breakfast

George the Elf is back this December and just in the nick of time!  I'm not sure my kids would have stayed on the nice list too much longer.  I needed the "George is watching you," threat!

So, George celebrated his return with his annual north Pole Breakfast.  you can see our last year's breakfast here. Get a cup of hot chocolate because there are a ton of pictures!


Inside each Santa gift bag was a Gymboree Christmas shirt and a pair of Christmas socks.


The kids were so excited about George's return! They were bouncing off the walls after a sugar filled, traditional elf breakfast.  The only thing we were missing is syrup.  :)


I love this picture because Garett is reading the note George left Nathan, and Nathan is eyeing the elf.  "You want be to be nice to my sisters??? All the time???"


Sources:
Reindeer Sippy Cups, cupcake cups, fondant cupcake toppers:  Target
Table cloth, Santa gift bags: Walmart

Wednesday, August 15, 2012

Gasp! I bought white couches!

Yes, I did it.  I am guilty of breaking the cardinal rule for moms with three kids; three young kids who are five and under, who have sticky hands, dirty feet, and holes in their mouths (that is the only way I can explain the amount of food that misses their mouths!!!).

I BOUGHT TWO WHITE COUCHES!!!  For my family room!  The room that we often eat it, the room that we live in.  See, I have wanted that white, shabby chic look for a long time.  I drooled over the Pottery Barn couches since my first son was a baby.  I thought I'd be old and gray before I could get them.

Then, I went to Ikea and found them--white SLIP COVERED couches and my heart did a little pitter patter right then and there!  They were cheap and on sale and SLIP COVERED!  That means, if I hate them in a year or two, I won't cry that I spent a fortune on them.  My husband and I scooped them up right there and brought them home.  We held a moment of silence for our sagging, stained, 8 year old couch and then chucked it to the curb.

This was three months ago, three summer months ago.  And guess what, the couches are still in almost perfect condition!  There is a spot or two on them, but they wash right out! These couches have been eaten on, jumped on (they became a gymnastics playground during the Olympics for my 3 and 5 year olds), and abused.  And I am still in love with them! Sigh...


I have my eye on a beautiful mercury glass lamp at Hobby Lobby to replace my pidly little lamp from the old house.  I also bought some curtains from Target that are way too short--see them folded up on the table??  Just haven't mustered up the energy to wait in the return line with three kidlets.

Tuesday, August 14, 2012

Long Ago, In a Galaxy Far Away...

A little boy was born, six years ago to be exact.  Now this little boy is a little obsessed with Star Wars and legos. And when his Crafting Mama asked him what kind of birthday he wanted, he looked at her like she had just lost her mind and said, "Lego Star Wars, of course!"  So, with a little over a month until the party date, I got my booty in gear!

My first project that I started on were for the take home favors.  I needed something affordable, cute (Star Wars can be cute, right??), and that matched the theme. So, I hopped in my car with my littlest in tow and headed to good old Wallyworld, where I found these bubble wands for a dollar each.  Inspiration struck.  They look like light sabers, right???


I rummaged through my garage until I found the black spraypaint and then picked up some silver at Walmart for less than $5.

First, I unscrewed the lid and stood the bubble wand up in a cup.  Then, I spray painted the top part black.  I used a paper towel to cover the actual white plastic wand part.

When that dried, I put painters tape over the middle and spray painted the two ends silver.  I took the tape off while it was still wet.


I let them dry overnight and then added a little red jewel as the on button.  I love how they turned out, and most importantly, my son loves how they turned out!


One project done, a million more to go!


Sunday, August 12, 2012

Template Love

Back in my pre third child days, I use to have a bit more time on my hands and became a photographer.  I loved taking pictures of everyone, from newborns, to families, and even seniors!  My clients would often ask me to design their Christmas cards, birth announcements, and birthday cards. many of them I would design myself, but sometimes it was just easier to buy templates.  Why re invent the wheel, huh?

As I was searching for templates made with photographers in mind, I hit GOLD with Birdesign!  I think I swooned over their cards for hours and now have many of them in my stash.  If you have, oh say lots of time to fall in love, go take a look at their new website! Have your wallet ready, though, because I warn you--you will find so many things you LOVE!

If you're not in the market for a birth announcement, they have a ton of other things to offer : blog banners, accordian style book templates (which make great Christmas gifts to grandma), and storyboards, just to name a few!


Friday, July 20, 2012

Sunshine Lemonade First Birthday

Well, she went and did it.  My very last baby turned one!  Gah, why does time have to go by so fast??!!  I think it may be time for another baby...Now I just need to convince my hubby.

So, for Ellie's first birthday, I knew I wanted the theme to have something to do with the song, "You are my Sunshine."  I sing that song to her while we cuddle.  Since she was born in June, I thought the sunshine theme would be perfect.  Then, I threw in the lemonade part just to make it a bit cuter.  Our colors were pink, yellow, and a pop of aqua.

I am going to have to break this into a couple of posts, because I don't have pictures taken of everything and I really want to share EVERYTHING!

So, let's start with favors.  I love sending my guests home with fun things.  For this party, I came up with my favorite favor ever--a CD filled with sunshine music.  I put some of my favorite songs on the CD for people to listen to on a rainy day.  They all had to do with sunshine.  But, my favorite part of the CD, was the CD itself.  I found this wonderful place that prints on the CD for you for very cheap--less than 50 cents each!  I didn't get a great picture of them, but here is an instagram photo of it!  My mother in law sewed up little square pouches to put them in.  I bought them from NCIMedia and I couldn't be more thrilled with their quality and service!  They were easy to order--I just designed the front and uploaded it!


The second favor were these cute little gumball tubes filled with lemonade gum.  I have seen these all over and really wanted to make sure that I included them in the party.  I didn't really want to pay too much for them and it seems like everywhere I looked, the shipping was outrageous!  I ended up buying them at I Heart Papers and was a little nervous about it since I had never ordered from them before.  But, I can't praise them enough!  The shipping was fast and inexpensive!  I will definitely be ordering them again from there!  Then I found a cute graphic online and changed the colors of it to match mine, added the polkadot background and had my silhouette cut it out.  I tied it on the top with bakers twine.  I am in love with baker's twine!


For the third favor (yes I might have gone a bit overboard) I found the CUTEST little candy bins with even cuter tiny scoops!  Since we had a lot of younger kids coming to the party, I wanted to make sure they have a favor just for them.  So I loaded each little bin up with matching M&M's. I designed a little label to go on top using digital papers that I used throughout the party and on her invites.  I loved the way they turned out!


Now, onto other decor.  I made this adorable wreath out of yarn, a little banner I made out of the same digital scrapbook paper, and a wooden letter I bought from Hobby Lobby.  My E sort of fell over during the party :(  It is supposed to be leaning up, tilted facing the right side.  Just use your imagination!


Another fun, and perhaps one of my favorite things of the whole party was the lemonade stand my hubby made!  I am in love with it and can imagine my kiddos using it a lot for impromptu lemonade sales!  We found the tutorial at Lil Luna and followed it very easily.  My fabric bunting ended up being a bit too big, but oh well.  I just loved the way the whole thing looked


I bought mason jars and wrapped them with left over scrap fabrics that I used for the bunting.

Now, onto inside and the dessert table!  I used a long table and butted it up against the fireplace. Since this was at my parents' house, I couldn't really take down their picture over the fireplace, so just pretend that isn't there!

My hubby and I made the Sunshine sign that morning based off of one that I had pinned on pinterest.  I love how it turned out and plan on hanging it in her room.  Then I added pictures from her one year old shoot on either side and some tissue poms.  I had more poms ready to make, but I ran out of time!  Imagine that!

I hung her banner on the fireplace and am so disappointed with how it looked.  I love the way it turned out, but it was wayyyyy to big.  I took a pic of her every day on her monthly birthday in some onesies I had made for my older daughter.  They have a number that corresponds with the month.  It was really cute, just way too big!

I bought a number 1 chocolate lollipop mold off of ebay and made these the week of her party.  They were super easy and the kids loved them!


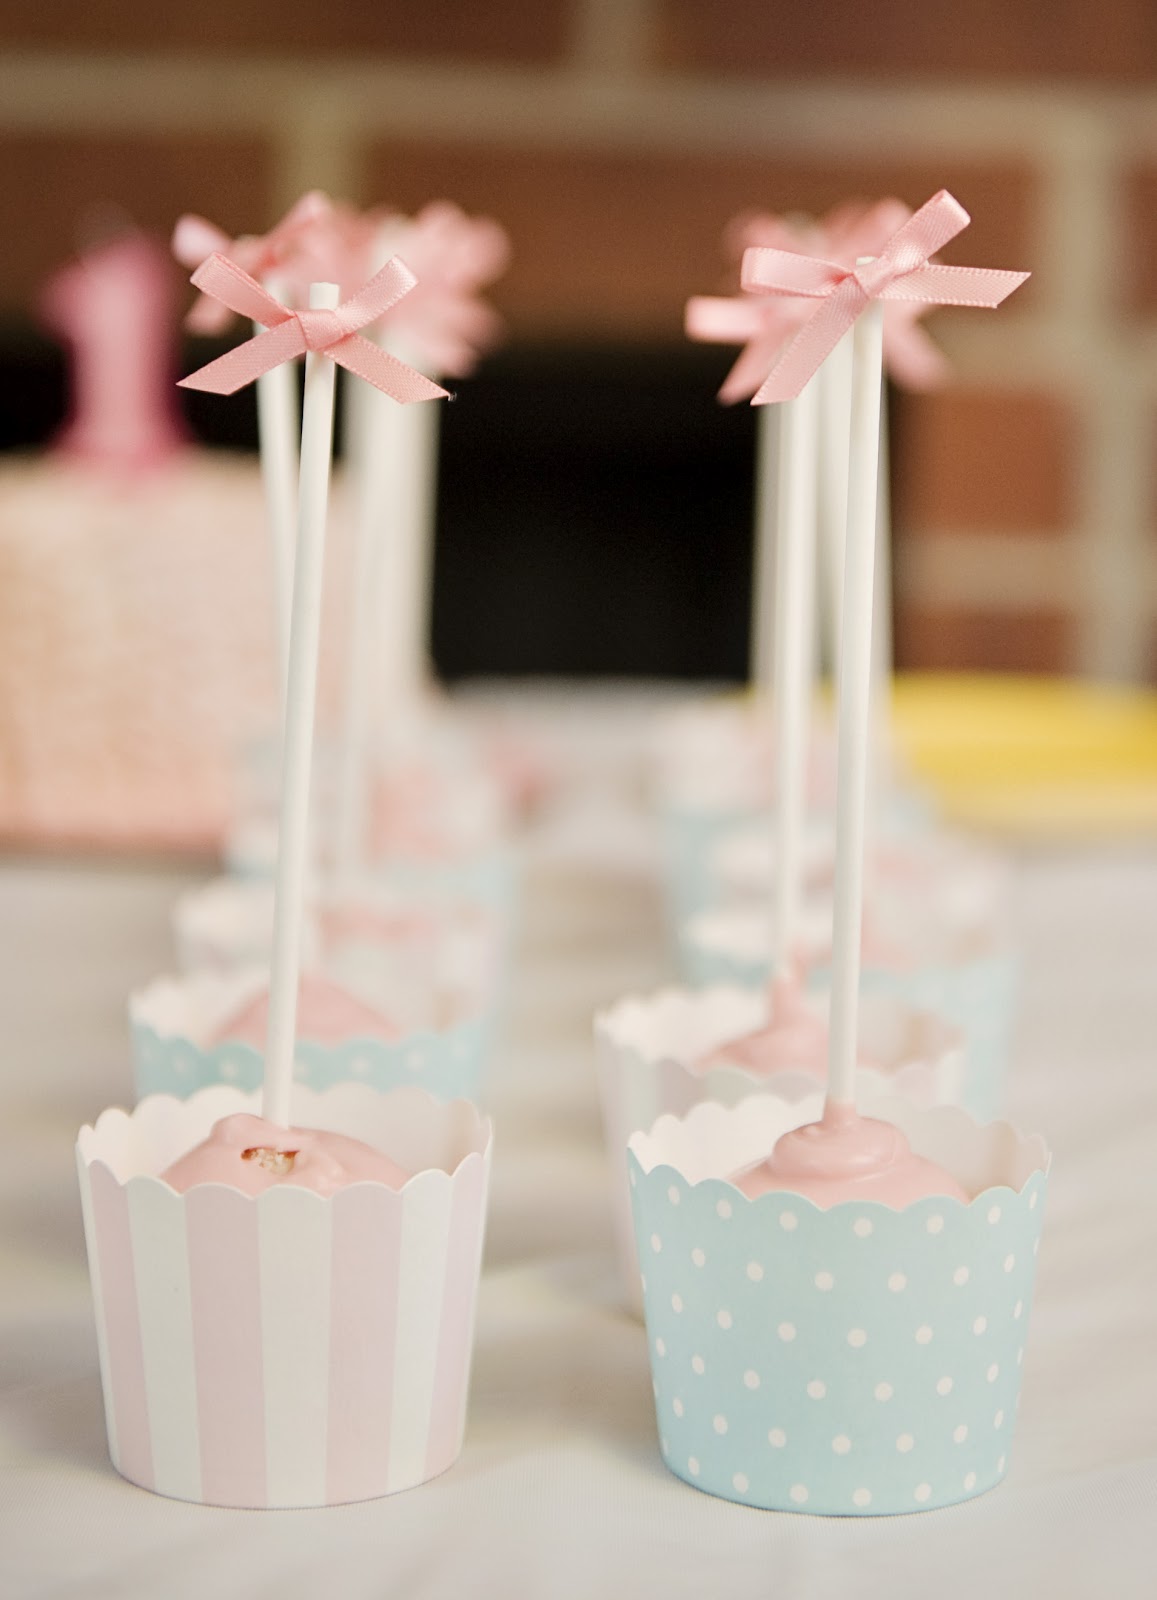
My sister made these cake pops for me and then I put them in the cutest little paper cups that I bought from Sur La Table.  I bought little Martha Stewart bows from Jo Annes and put them on the tip of each stick.  I LOVED how these looked!

Her store bought cake.


I made her tiny smash cake.  I loved the way it turned out and it was super easy to make!


I scoured Craigslist for months looking for an antique highchair!  I finally found one and sprayed it pink, then distressed it.  It turned out just like I envisioned and she looked super duper cute in it!


 Next week I'll post pictures of the activities that we did, our fingerprint guest tree, her invitation, and some super cute pictures of the birthday girl herself!

Thanks for visiting!

Shared on these wonderful blogs:

The Shabby Nest Somewhat Simple Photobucket